Friday, June 7, 2013

Gee, 12+ year old bilge pump not working???

I started cleaning out the interior and the simplest thing to do was bring the hose inside and start with the simple green and scrubby. The water has to go somewhere and the bilge is the place. There is a garboard drain plug(threaded plug installed in the bilge to allow water to drain out when on the hard) in the bilge but it's up high enough that several inches of water can be in the bilge. So I brought the battery and solar panel from my truck camper and tried to hook up the electric Rule 500 pump. I suppose these cheap little units are not meant to be submerged for 12+years. So it was off to Hamilton Marine for a replacement. There is a nice Whale Gusher mounted in the cockpit but again I'm lazy and would rather let the sun and a SHURFlo 380 keep the bilge dry. Plus once I stick a float switch on it will empty when I'm not around and the boat is still far from rain proof:(  
Water level about 2" blow the floor. Very old bilge pump.

New SHURflo takes up the job. 

But the kink in the bilge discharge hose had to be fixed. 
And how does rainwater get inside? First there is these neat little cockpit drain the simply drains inside? I have no idea if this was the original idea but seems a little strange.

Mystery drain in front of cockpit.
Mystery drain open into engine compartment.
Then there are the actual side deck and cockpit drains themselves which where clogged, kinked and basically fell apart when I tried to remove the hoses to clear them. So they for now they also drain to the bilge:( The upper rear line(cockpit seat drain) was dry rotted and ripped apart in my hands and the upper foreground line(side deck drain) is collapsed with a perpetual kink. These two lines are combining with the cockpit sole drain.
clogged drain lines

There is also the old transmission shifter slot in the cockpit sole and if there were standing water the old engine controls openings. Plenty of things to fix before Phoenix can be left on a mooring unattended. 


P.S. Update to cleaning the deck. Forget using Simple Green and brushes, use a pressure washer! I needed to buy a 2700psi pressure washer for some house projects so I decided to try it on the filthy decks. With a 25deg nozzle it worked fantastic. It did remove some chipped loose paint but that needed removing anyway.   I finished the entire deck in the time it took to clean one cockpit locker! And the deck is much cleaner than I was able to do with the brush. 

Monday, June 3, 2013

Cleaning....

Certainly not the most exciting thing to do but every time I touch a surface dirt or paint chalk comes off on my hands. So today I spent several hours just cleaning. First came the mast and I attacked it with a hose, simple green in a squirt bottle , bristle brush,  a green scrubby pad. As I washed I inspected and liked what I saw. It was built in 1992 by Annapolis Spars Inc and is in generally great condition. The white paint is chipped in many spots all the way through the green primer to the aluminum but it's not bad enough to be stripped and redone. I may get some white Rustolium and touch it up but probably just wax it and be done. About the only real problem is the missing lower pins on the rigging. The yard managed to loose them all! 
Seriously moldy Main and Jib halyards


Then I climbed up and started on the cockpit. The entire boat is covered with at least 12 years of air pollution. Being on the hard near a major airport sucks. Those jets will turn a boat black in just a few weeks, so Phoenix took a ton of elbow grease just to get part of the cockpit cleaned up. The nonskid holds on to that junk tight. 
Even the topsides look better when cleaned:)
Starboard cockpit locker getting cleaner.
I got bored scrubbing and decided to see how simple green would work on seriously dirty teak.  Well it kinda works, but I broke down and mixed up an batch of water(3 qts)/TSP(1 cup)/clorox(2 cups) and that mix really does the trick! Still a lot of elbow grease but wow the results are great. After cleaning up the starboard coaming I can see doing some sanding and varnish. Really I'm too lazy to keep the teak clean and let it go silver because that also means black mold. I like the look of silver/gray teak but not when it's covered with black mold, which turns green when wet. Now that's ugly. But now that I've cleaned it up I suppose I need to finish the job and varnish. Certainly not the most important job, but having pretty teak and a clean hull make it more of a pleasure to work on the must have done list:)
A nice shade of green mold.

Mold does't look so bad when dry.

TSP/Water/Clorox quickly turns a nice shade of brown.

Left side(aft end) cleaned with TSP, Right side gets it next.

Sunday, June 2, 2013

Aux prower!

Poor old Phoenix was abandoned and her trusty old Atomic 4 was heisted, so what should I do about aux power? I considered and rejected Electric(Torqueedo) and a new outboard( Tohatsu 6hp Sailpro ) but choose instead…..drum roll please…..A 1957 Evinrude Sporttwin 10hp 2-cycle outboard. I scored this classic motor in Annapolis off craigslist for a whopping $75. Heck the sporty outboard bracket that I got from Bacon's Marine cost that much:)

Classic lines:)

Note the manual choke, low speed idle mixture and high speed idle mixture!

Cool clam shell cover!
I started the rejuvenation of the Sportwin. That will basically be a carb rebuild, new points, condensers, coils, plus and plug wires. Also cleaning and lubrication as needed. 

90 DegsF at 9am in Downeast Maine USA oh and I moved the mast off Phoenix:)


For Christ-sake please you southerners take your weather back! I decided to move the mast to ground level to improve movement around deck and to better evaluate what is needed to make the mast ready for sea. After some test lifts of the mast in place and getting a feel for the weight I decided it would be simple enough to lower it over the side using some 2"x4"x8ft studs and a 4:1 block and tackle. The 2x4 across the rear pushpit (the safety rail around the rear) was supporting the mast head and only stuck out about 3ft. This one was fine just laying on it's side. The forward 2x4 was counter levered much farther, maybe 5ft and the mast foot was much heavier so I ended up making a T with another 2x4. It may have been strong enough but I was a little worried by the bend and these are just cheap construction grade pine 2x4s. And once the T was built there was zero bend. 


The mast foot was much heavier, but I used the same procedure.  However, I should have left the mast head on the ground as the old sawhorse collapsed and dropped it to the ground.  I really should have seen this coming:( As soon as I lifted the mast foot at the bow, the mast wanted to slide downward to the rear. Then when I reset the mast, the saw horse tipped. I've really got to get "THINK IT THROUGH" tattooed on my forearm or something. Luckily the ground is soft and no harm done.

After some quick measurements to determine if this "new" mast matches the original mast/boom dimensions I cleared up the area and retreated to the basement for other projects and the coolness.  

Tuesday, May 28, 2013

Home at last

I didn't like having Phoenix at the bottom of the hill, it was going to make logistics to difficult and caused a tight squeeze on the driveway. So today I hooked up the trusty old F250, put it in 4 wheel drive low range and motored on up the hill. No slippage but the turn at the top is too tight. I'll need to get some landscape work done before Phoenix ever leaves her hill top perch.


A very sharp turn just past the tree on the left.

 The only problem is dual trailer wheels tear up turf when in sharp turns.

Monday, May 27, 2013

60mph to windward!

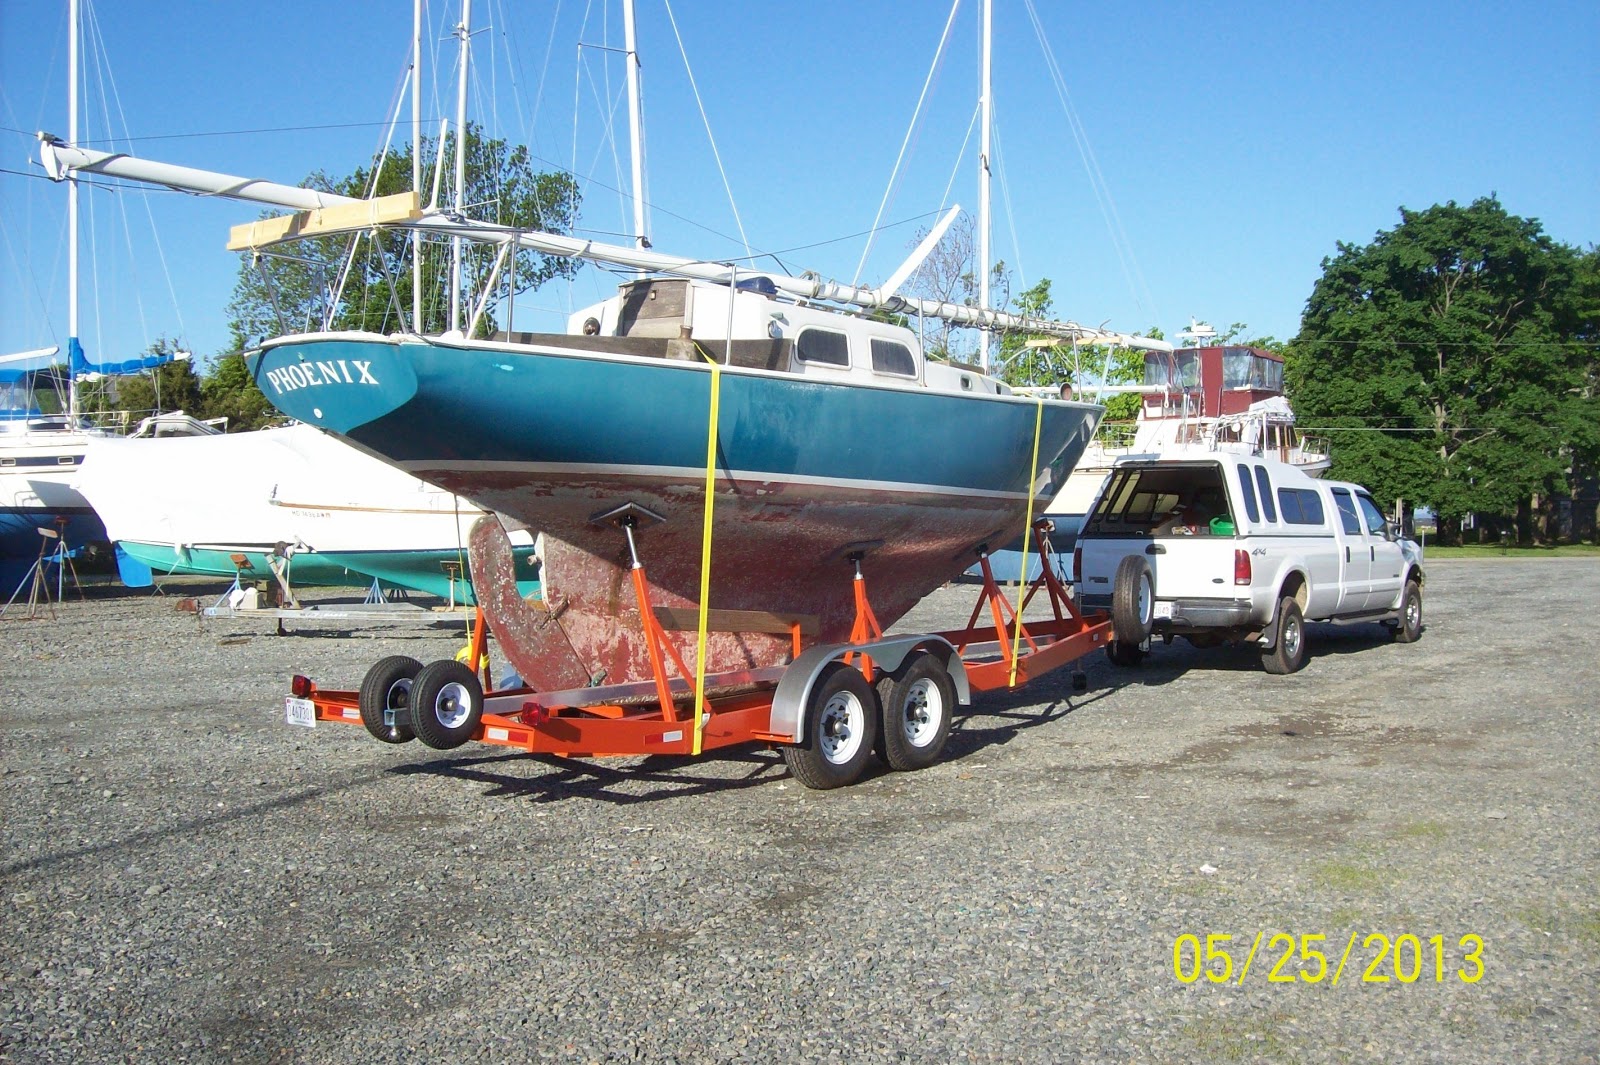
A 6am departure from Rock Hall MD on Memorial weekend Sunday was a good call, and I think the cool NE weather helped keep traffic light. Once Phoenix was hooked up I drove to Rt 301 and before getting on the hwy made my first of several routine equipment checks. They go somewhat like this..
  1. grab the non-contact infrared thermometer
  2. measure inner, middle, outer tread temperature on each truck and trailer tire
  3. measure the center, wheel bearing temperature.
  4. check the hitch and safety chains 
  5. check tension on boat straps 
  6. check mast position and supports, from ground level.
  7. reload on coffee
  8. done!
It was on about the third stop, IIRC we were at a Connecticut rest stop when the excitement, red angry moment came and found something else that needed checking. The rear two and middle two side supports were loose and Phoenix had a slight but noticeable lean to port! WHAT THE F! The marina guys had not tightened the supports and only the fact that I had two straps over the top and the forward supports were already in the full down position kept a disaster from happening. I didn't have a wrench large enough to tighten things up but I had a bar type clamp the did the job. After several minutes things were all straight and snug again.

My Ford F250 long bed crew cab did a fantastic job as a tow vehicle. And the 7.3L diesel had plenty of power and by keeping the speed in the 50-60mph range and not charging up hills it managed 12mpg! Not too shabby I think when towing about 10k lbs and have the bed and interior full.  I wouldn't hesitate to pull Phoenix short or long distance should the need arise.
Rest stop on the Mass Turnpike.

Her new home, until things dry out and she moves to the top of the hill. 

Saturday, May 25, 2013

D-Day minus one...

Finally after a couple weeks delay Phoenix is on her trailer ready to roll!!! I drove over to Rock Hall at the crack of dawn this morning to beat any Memorial Day beach traffic. The Bay bridge can back up something nasty on Saturday mornings but this early it was a breeze. I did need to secure the rigging and retie the mast back. Looks like the yard workers got tired yesterday evening and a bit sloppy. Then check/filled the trailer tires, check adjust the truck airbags, check fill truck engine and transmission etc and I think I'm ready for the 700+miles to come tomorrow.